I'm the developer of LibraryCoverStudio. It combines a community template store, a visual editor, and scheduled updates for Jellyfin/Emby library-section covers.
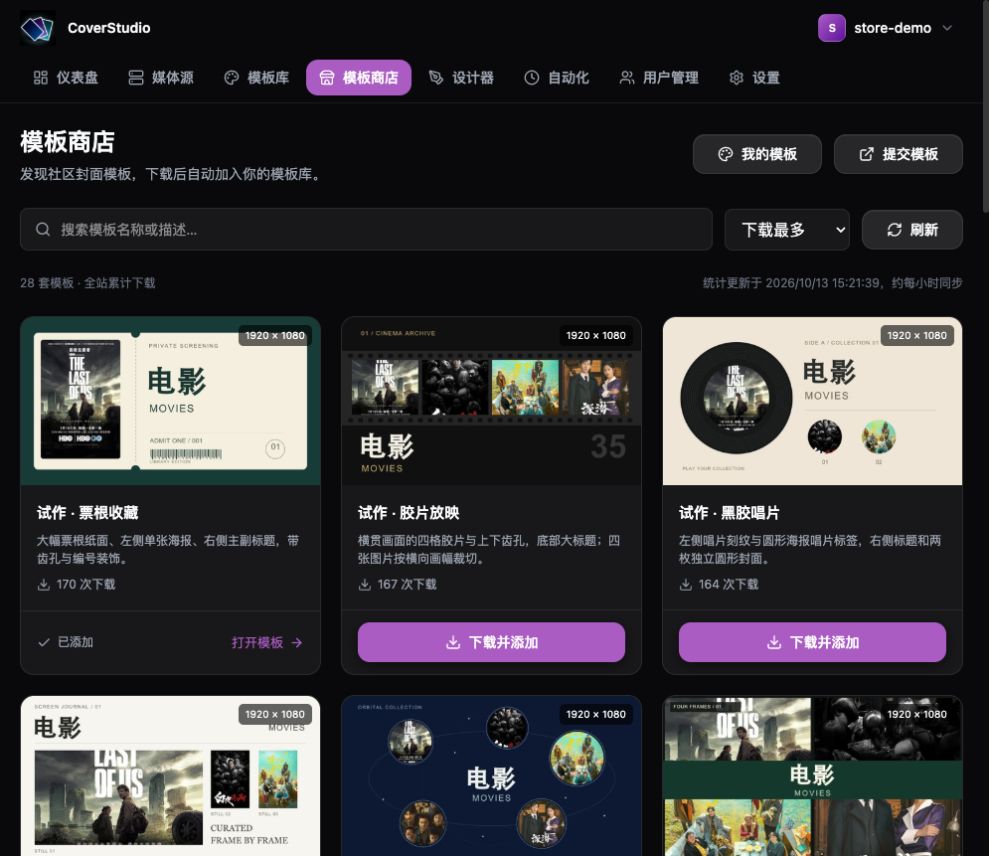
The store is where you can start: search by template or author, inspect previews, and download an editable layout. Change its text, colors, and poster placement, then fill it with artwork from your own library. Downloads appear in both the editor and automation task's template picker. Seven built-in templates and ZIP import/export are also available.
!The community template store, shown with demo data
For example, you can use a ticket design for Movies, a weekly “Recently Added” poster wall, or random poster selection to bring older items back into view.
## Quick setup: from Docker Compose to your first cover
You'll need Docker with Compose v2 and an existing Jellyfin or Emby server.
### 1. Start the app
Create an empty directory and save this as
compose.yaml:services:
library-cover-studio:
image: evanqu/library-cover-studio:latest
restart: unless-stopped
environment:
JWT_SECRET: "REPLACE_WITH_RANDOM_JWT_SECRET"
ENCRYPTION_KEY: "REPLACE_WITH_RANDOM_ENCRYPTION_KEY"
ports:
- "8080:8080"
volumes:
- ./data:/app/data
Replace the two placeholders with different random values. Run
openssl rand -hex 32 separately for each value. Keep those values and the data directory when upgrading.From the same directory, run:
docker compose up -d
Open
http://YOUR_SERVER_IP:8080, or http://localhost:8080 if you're browsing on the same machine. The first visit defaults to Chinese; switch the login screen to English, then register an account on your own instance. The first account becomes the administrator.### 2. Connect the media server
Open Media Sources → Add server. Choose Jellyfin or Emby, enter its URL and an API key from the media server's dashboard, and test the connection.
For a LAN server, that might be
http://192.168.1.20:8096. Use an address reachable from the app container: localhost inside that container points to the container itself.The key needs permission to read artwork and update library covers. Once connected, check that your libraries are listed. There is no need to mount movie directories.
### 3. Download a design from the store
Open Template Store, search or browse the previews, and click Download and add. The design is added to Templates and becomes selectable in the editor and automation.
Use it directly, or make a copy and adjust the text, colors, and poster placement. Save any edits before running a task. Store downloads are fetched by the backend, so the container needs access to GitHub.
### 4. Preview, then upload one cover
Open Automation → New task and select your server. Start with just one library.
Choose the downloaded template, set Primary title and Secondary title, and pick a poster order: Recently added for new artwork or Random for a changing selection.
Click Generate real preview. This renders with posters from your library without uploading or changing the media server.
When the result looks right, select Run manually, review the configuration, and click Create task. Saving does not upload anything. Back up the current library cover if you want to keep it, then click Run now in the task list.
Open View run history to inspect the per-library result, and refresh Jellyfin/Emby to check the uploaded cover.
!Run history with per-library results and generated covers, using demo data
### Optional: keep the design and refresh its artwork
After the manual run works, edit the task and